
Jupyter notebook事始め(1)-Pythonを手軽に使う
| 目次 |
|---|
| はじめに事前準備Jupyter notebookと関連パッケージのインストールJupyter notebookの設定Jupyter notebookの起動 |
はじめに
Jupyter notebookとは、まるで私たちが通常使っているノートのように、Pythonのコメントや処理などを書き、さらに書いたプログラムを実行させて結果まで表示させるツールです。紙のノートのように、何度も書き直したりすることがきる、プログラムの一行ずつでも書くことができます。このようなノートブック形式のツールは、データ分析の作業を行うのによく使用されます。
ここでは、Jupyter notebookを起動し、簡単なコードを実行するところまでを紹介します。
事前準備
まずは、Jupyter notebookを動かす基礎環境を準備します。ここではCentOS7上のPython3.5を準備します。CentOS7+Python3.5の環境については、「いまさら始めるPython3(1)-CentOS7環境への導入-」を参照して構築してください。
Jupyter notebookと関連パッケージのインストール
次にJupyter notebook本体とその他関連するパッケージをインストールします。関連するパッケージは、今後Jupyter notebookを使っていく中で必要になりそうなもの(psycopg2, ipython-sql, numpy, matplotlib, seaborn, scikit-learn)をここでは選んでいます。必要に応じて関連するパッケージは選択してください。
| # pip3.5 install jupyter psycopg2 ipython-sql numpy matplotlib seaborn scikit-learn・・Successfully installed ・・・・# |
|---|
Jupyter notebookの設定
次に、Jupyter notebookを実行する環境の設定を行います。Jupyter notebookの起動方法としては、ユーザー単位で起動する場合とシステムとして起動する場合がありますが、ここでは、個人のノートブックとして使うことを前提として、ユーザ単位で起動する環境を作ります。
まず、実行ユーザをCentOSにログインし、以下のコマンドを実行します。
| $ jupyter notebook --generate-config |
|---|
このコマンドの実行により、設定ファイル「~/.jupyter/jupyter_notebook_config.py」が生成されます。この設定ファイルを以下のように編集します。
なお、Jupyter notebookは、セキュリティの都合?のためか、使用するときに、トークンを指定するかパスワードを入力するかのいずれかの方法で使い始めます。ここでは、パスワードを入力する方法を紹介します。
| ## The IP address the notebook server will listen on.c.NotebookApp.ip = '172.16.15.15'←IPアドレス## The port the notebook server will listen on.c.NotebookApp.port = 8888←ポート番号## Token used for authenticating first-time connections to the server.## When no password is enabled, the default is to generate a new, random token.## Setting to an empty string disables authentication altogether, which is NOT# RECOMMENDED.c.NotebookApp.token = 'password-string'←パスワード文字列 |
|---|
また、notebookに書いたものを、「ノート名.py」に保存するために、設定ファイルの以下の部分を書き換えてコードを挿入します。
# c.FileContentsManager.post_save_hook = None↓上記の部分について、以下のようにコードの挿入と書き換えを行います。import osfrom notebook.utils import to_api_path_script_exporter = Nonedef script_post_save(model, os_path, contents_manager, **kwargs):"""convert notebooks to Python script after save with nbconvertreplaces ipython notebook --script"""from nbconvert.exporters.script import ScriptExporterif model['type'] != 'notebook':returnglobal _script_exporterif _script_exporter is None:_script_exporter = ScriptExporter(parent=contents_manager)log = contents_manager.logbase, ext = os.path.splitext(os_path)py_fname = base + '.py'script, resources = _script_exporter.from_filename(os_path)script_fname = base + resources.get('output_extension', '.txt')log.info("Saving script /%s", to_api_path(script_fname, contents_manager.root_dir))with io.open(script_fname, 'w', encoding='utf-8') as f:f.write(script)c.FileContentsManager.post_save_hook = script_post_save |
|---|
次に、ipython-sqlを入れた場合は、バージョンを確認し、もしバージョンが0.3.9でなければ、ipython-sqlをアップデートします。
| # pip3.5 freeze | grep ipython-sqlipython-sql==0.3.8←古い# pip3.5 install git+git://github.com/catherinedevlin/ipython-sql.git・・Successfully installed ipython-sql-0.3.9 pgspecial-1.8.0# pip3.5 freeze | grep ipython-sqlipython-sql==0.3.9←この版ならOK |
| --- |
Jupyter notebookの起動
最後にJupyter notebookを使用するユーザでログインして実行します。
| $ jupyter notebook |
|---|
次に、IEやChromeなどのブラウザで、「http://IPアドレス:8888」にアクセスします。(ここでは、設定ファイルのポート番号を8888とした場合)
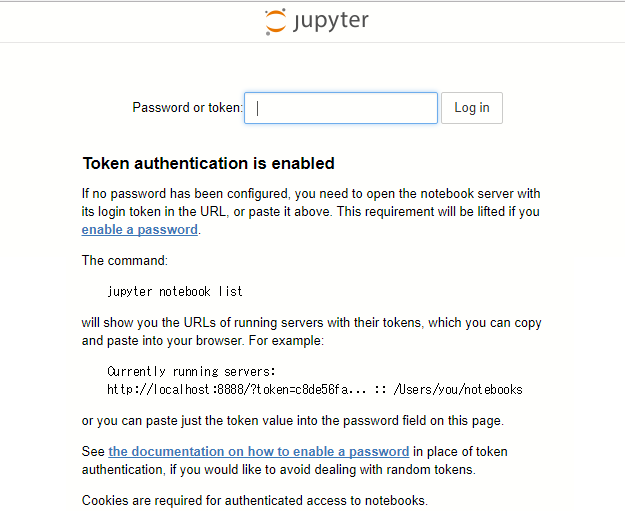
設定ファイルに指定したパスワードを入力し、「Login」ボタンをクリックします。
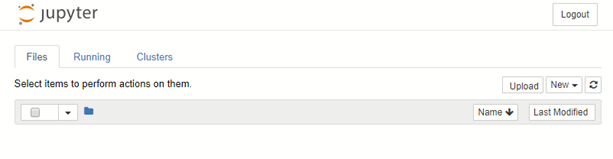
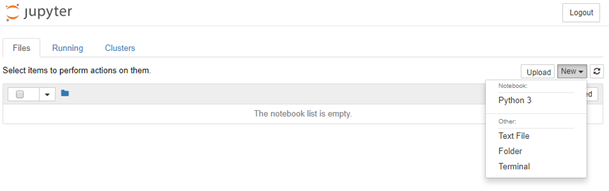
ログインできたら、「New」から「Python」を選択してNotebookの書きこみを始めます。
以後、各種の処理を記述し、notebookとして保存したり流用したりします。
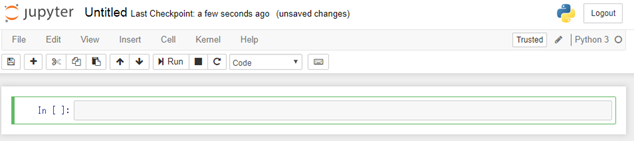
以上でJupyter notebookが使えるようになりました。
ここで作ったノートブックは、実行ユーザーの「~/notebooks」配下に「ノートブック名.ipynb」と「ノートブック名.py」の3つのファイルが作られます。「ノートブック名.py」の方は、「$ipython3 ノートブック名.py」で実行することができます。
今回の記事はここまでです。